Fun with Suzie blue

Latest

Fall update

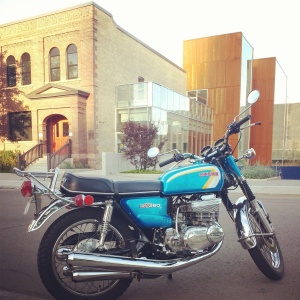
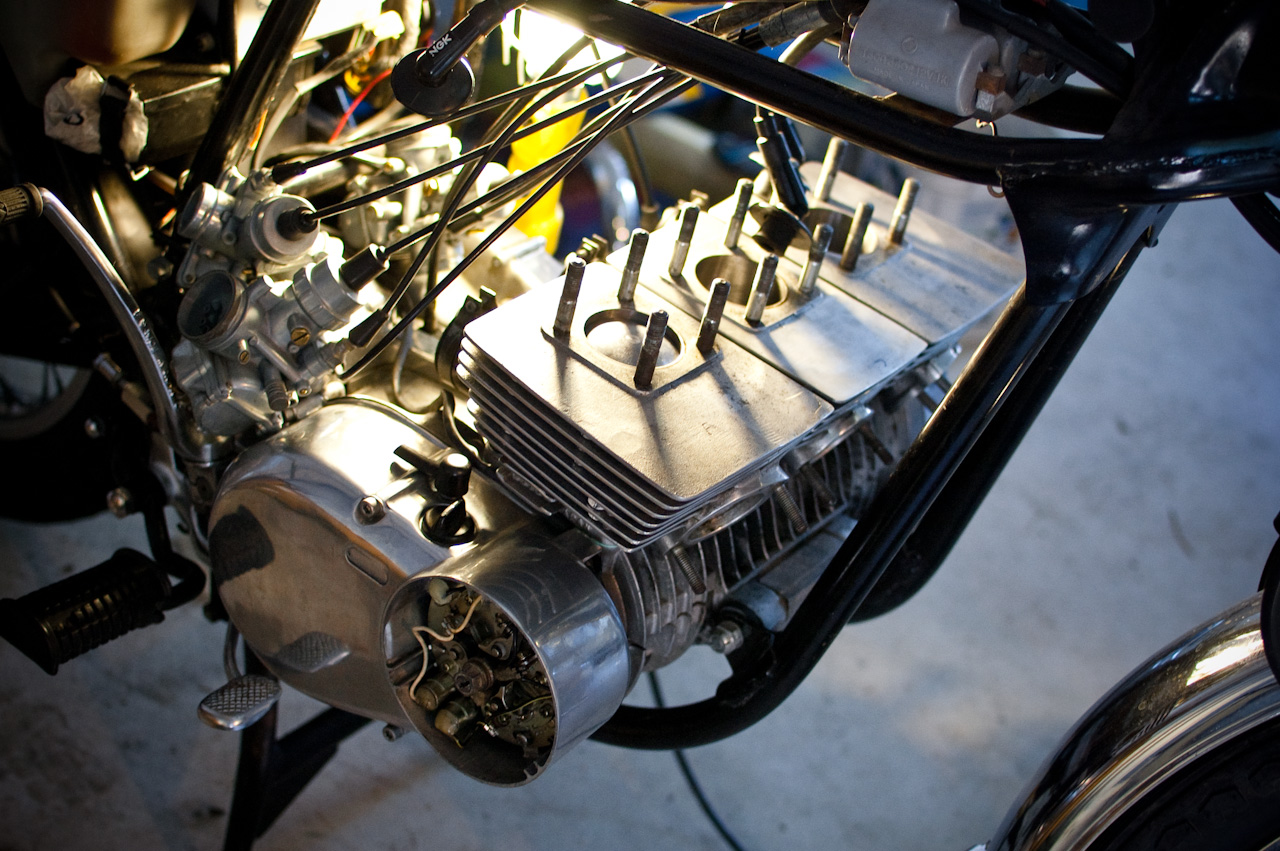
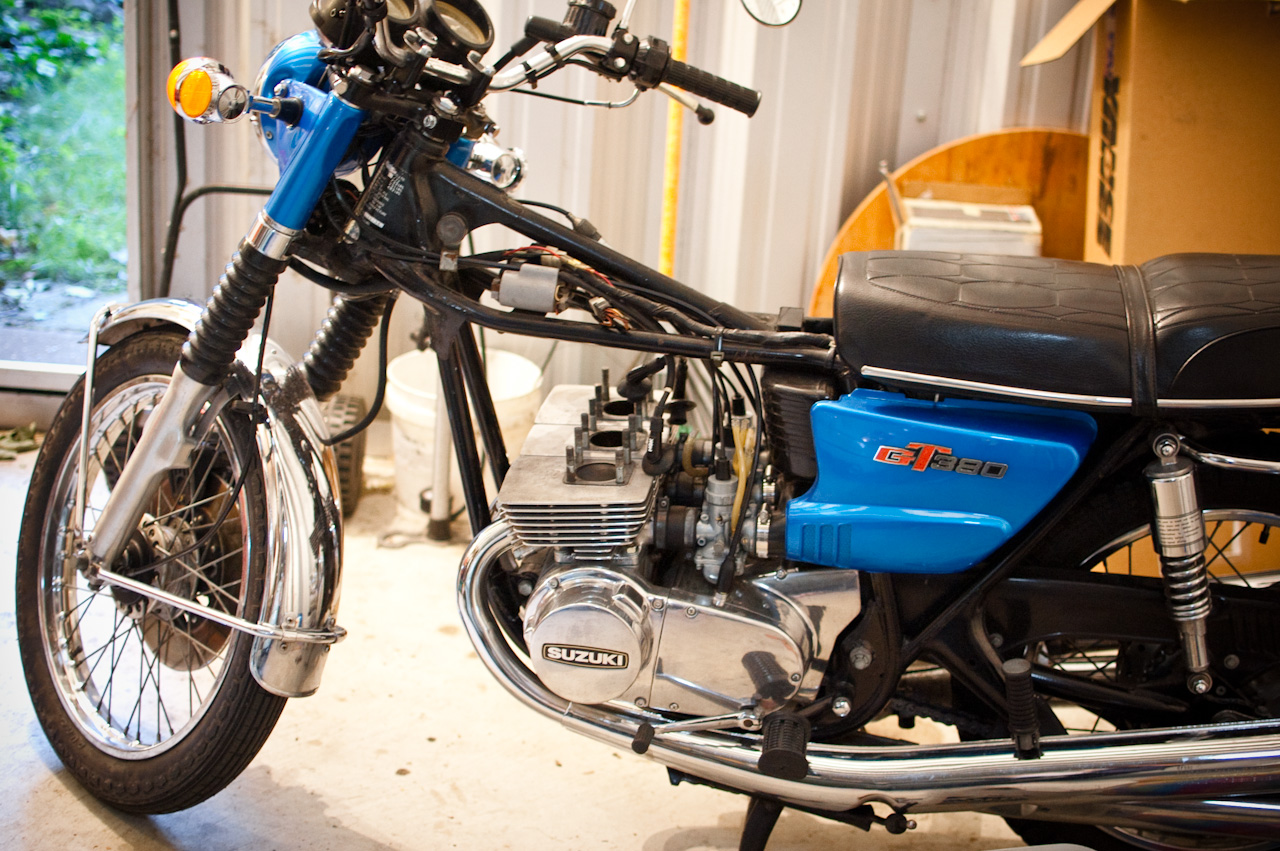
Suzie has been my main vehicle this year since I sold my car. I did quite a bit of riding and I now have just over 50,000 km on the engine. As the weather is getting pretty frigid around here, it was time for some maintenance before the imminent winter storage.

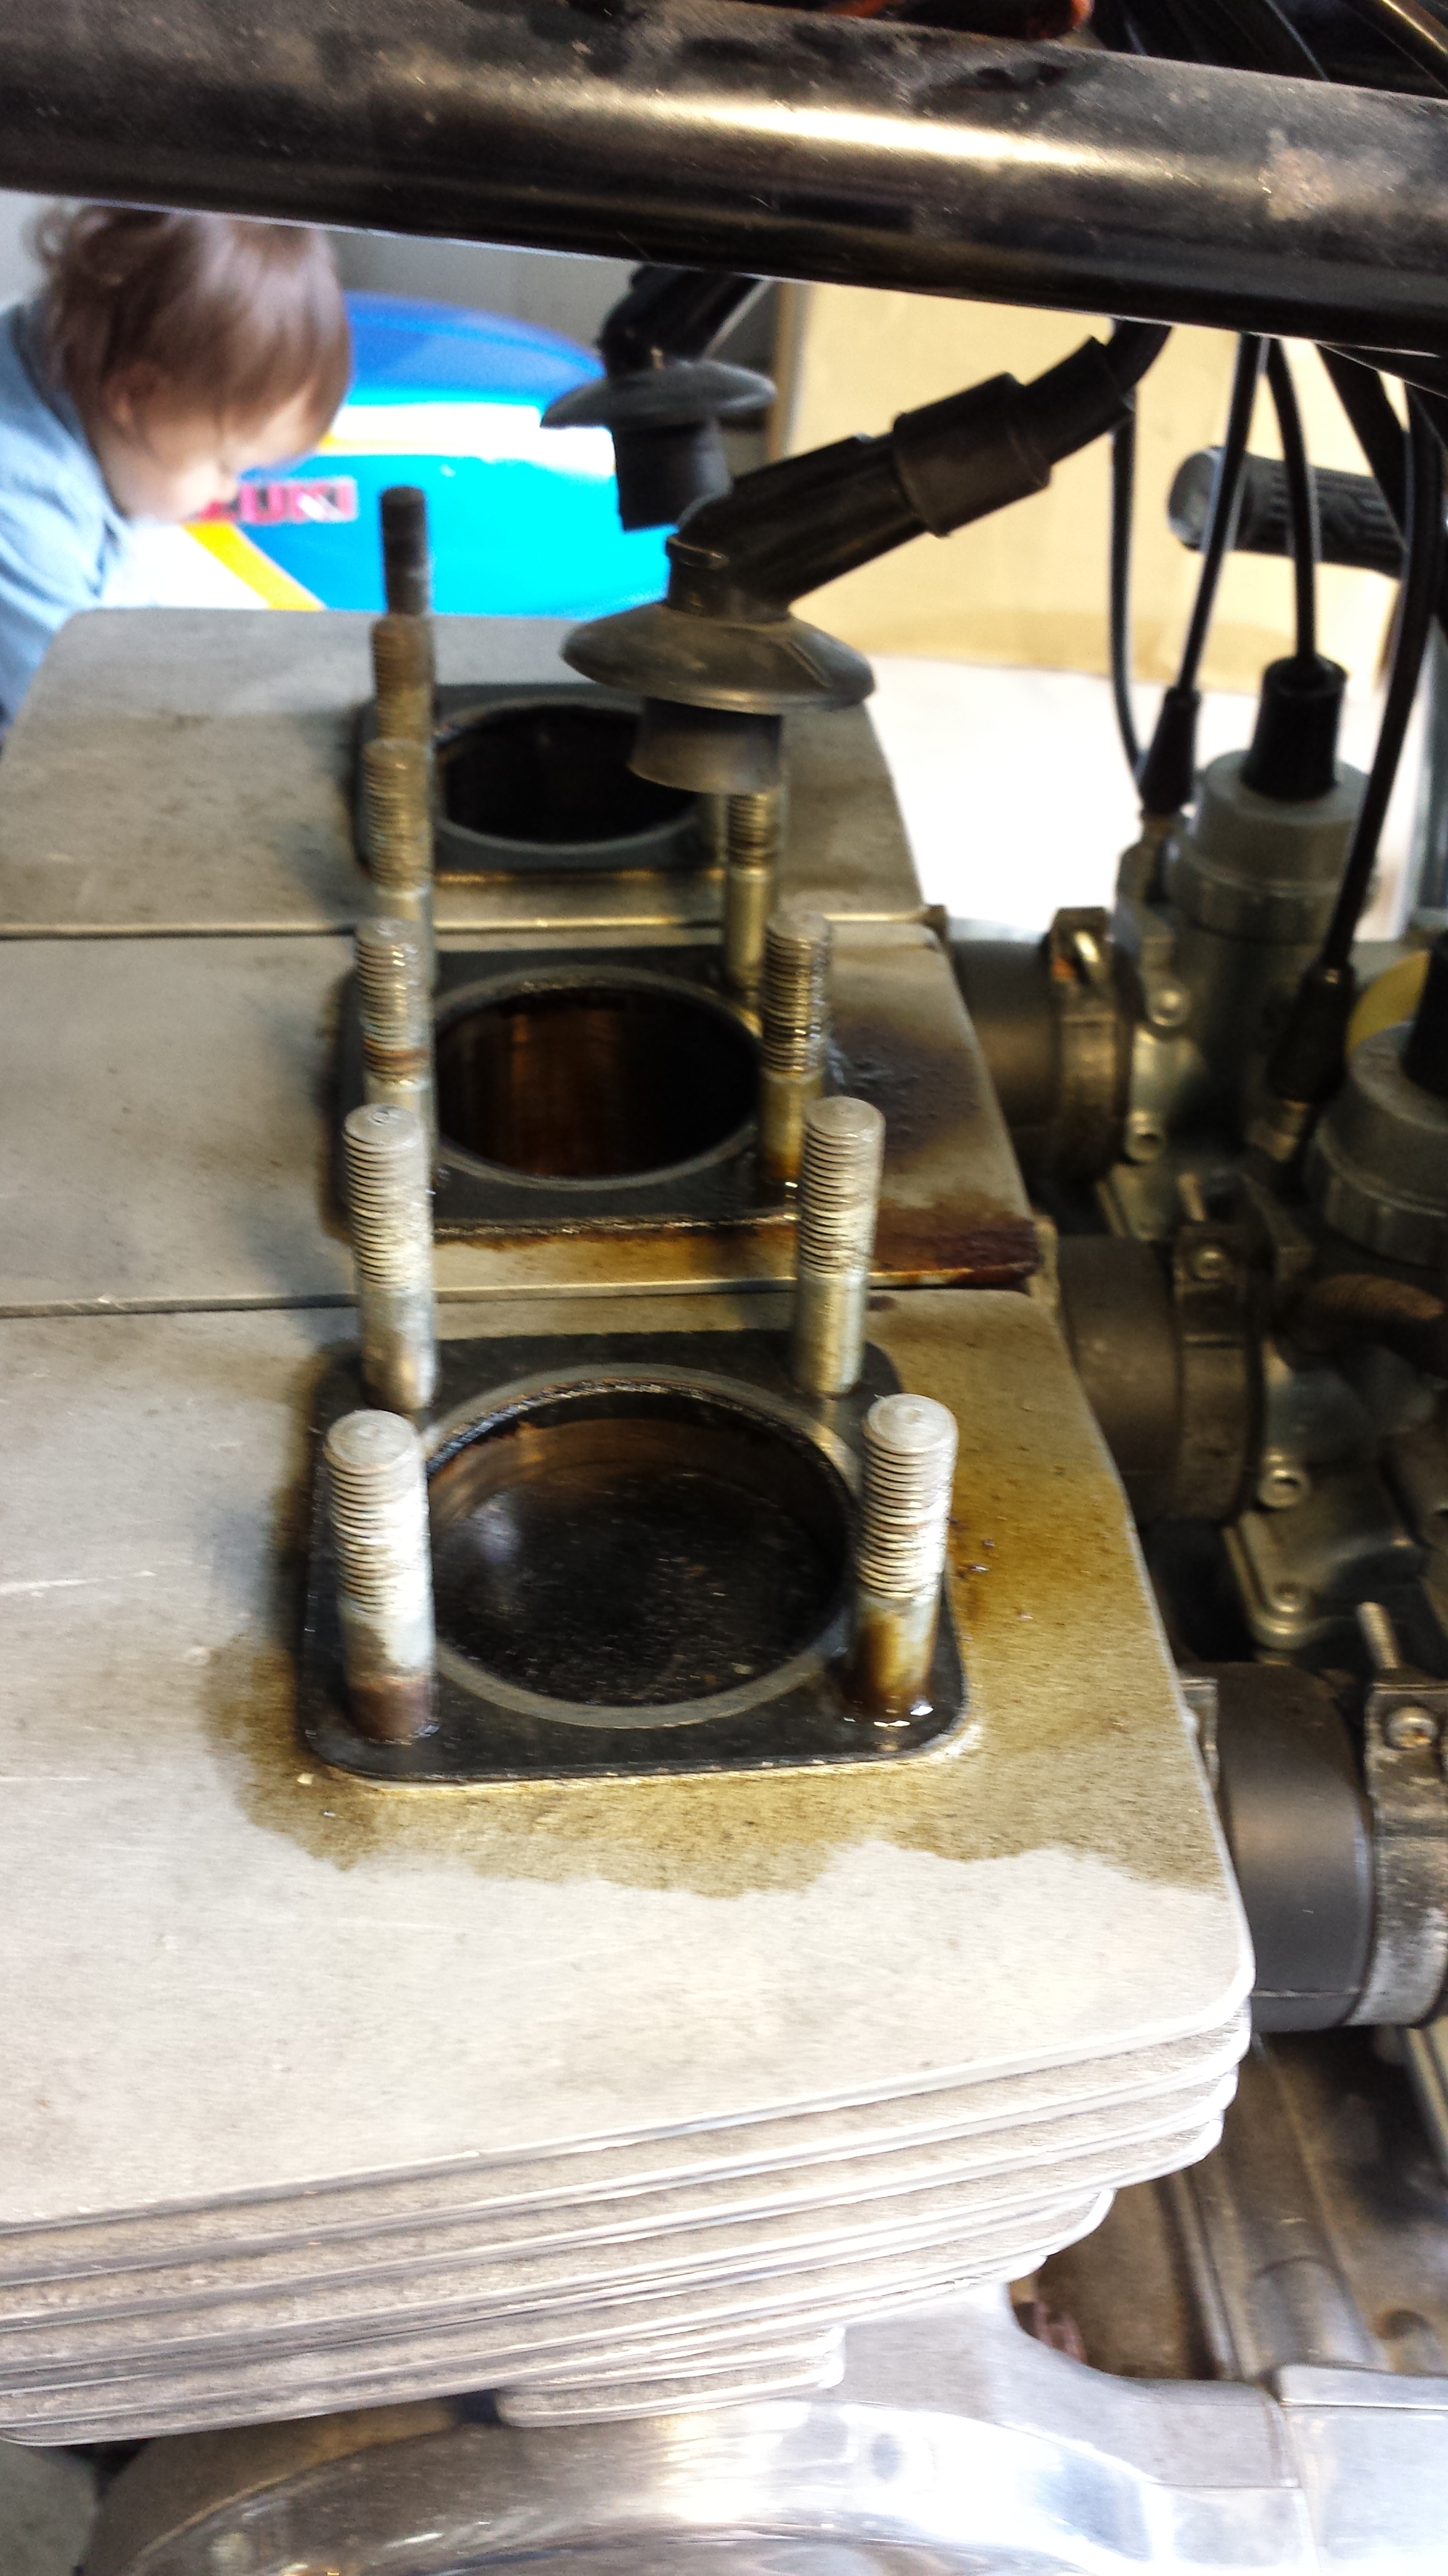
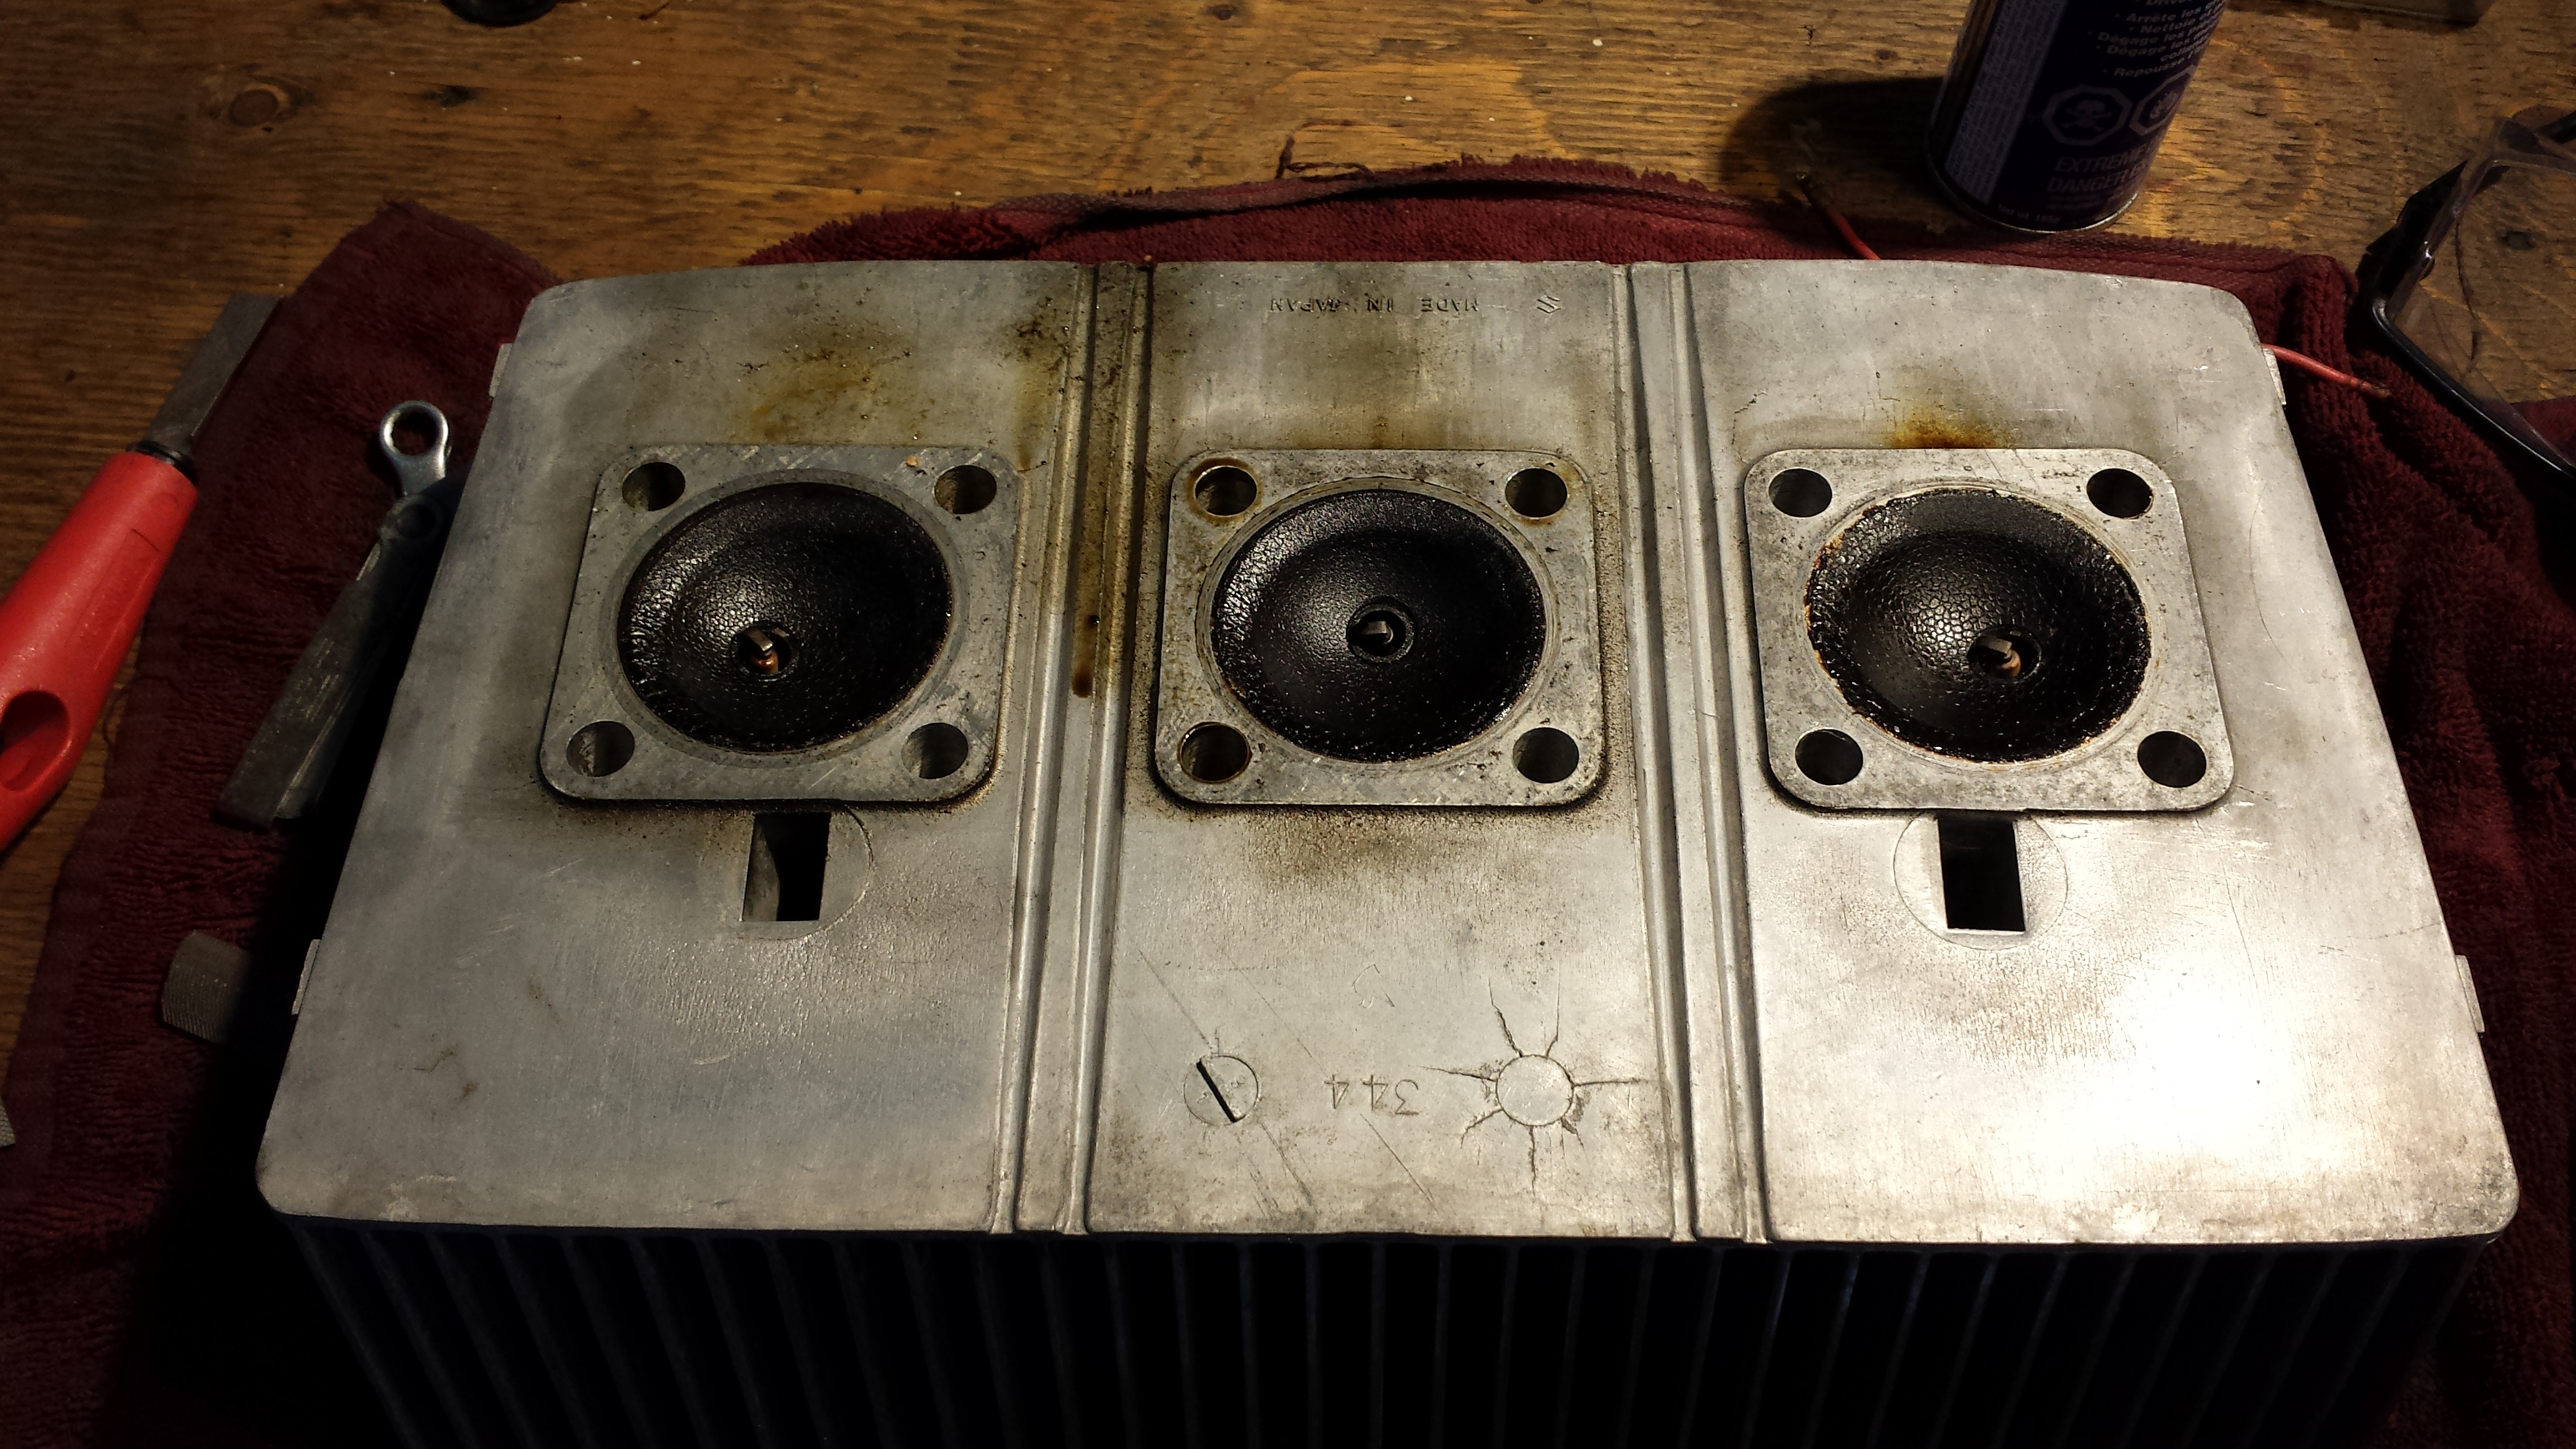
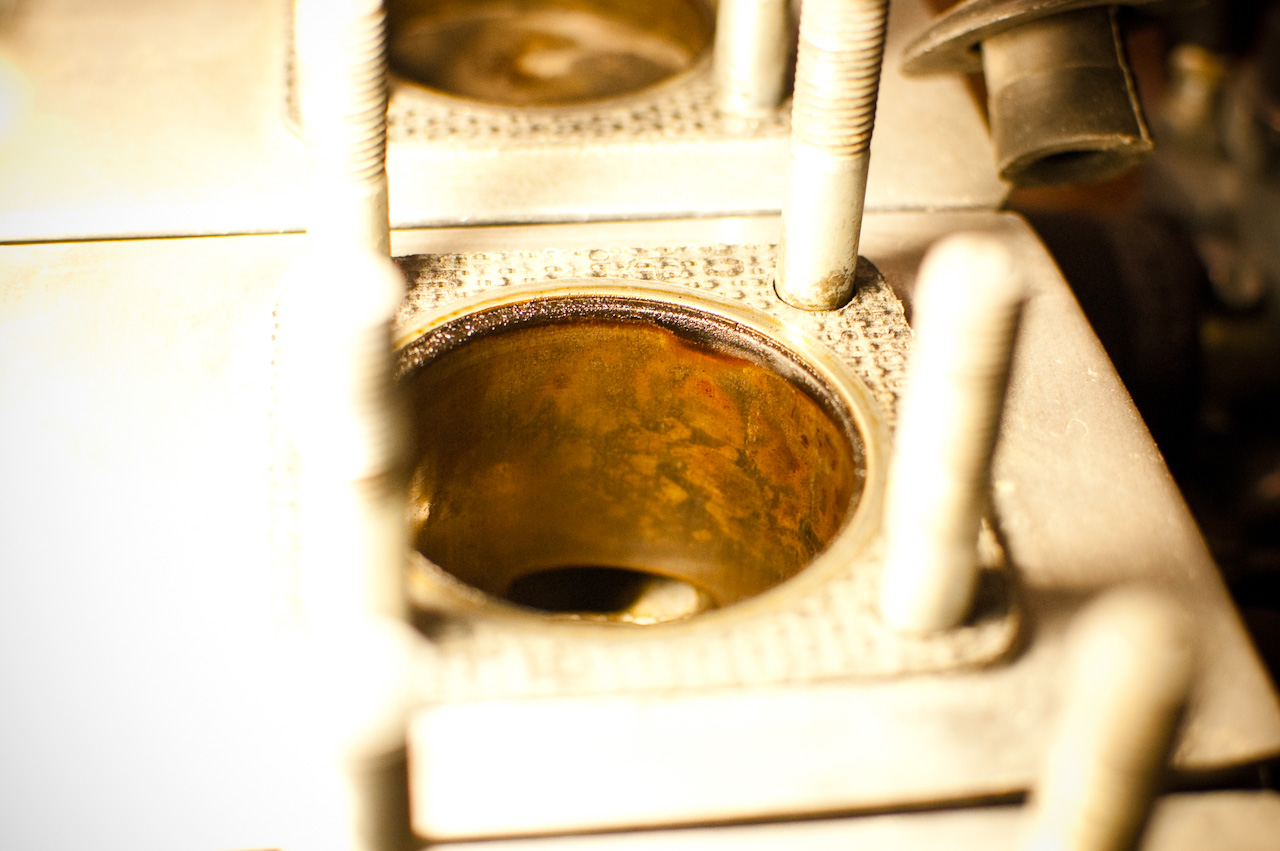
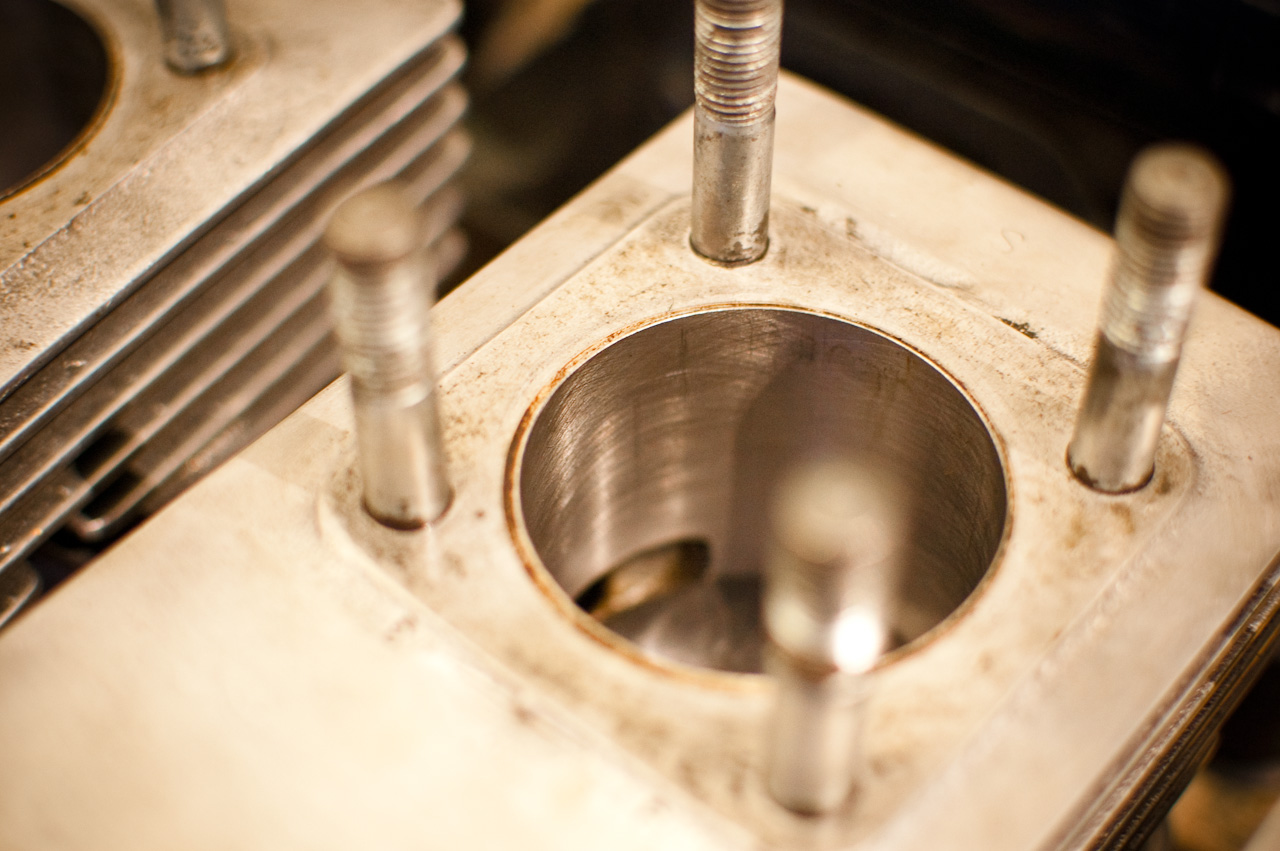
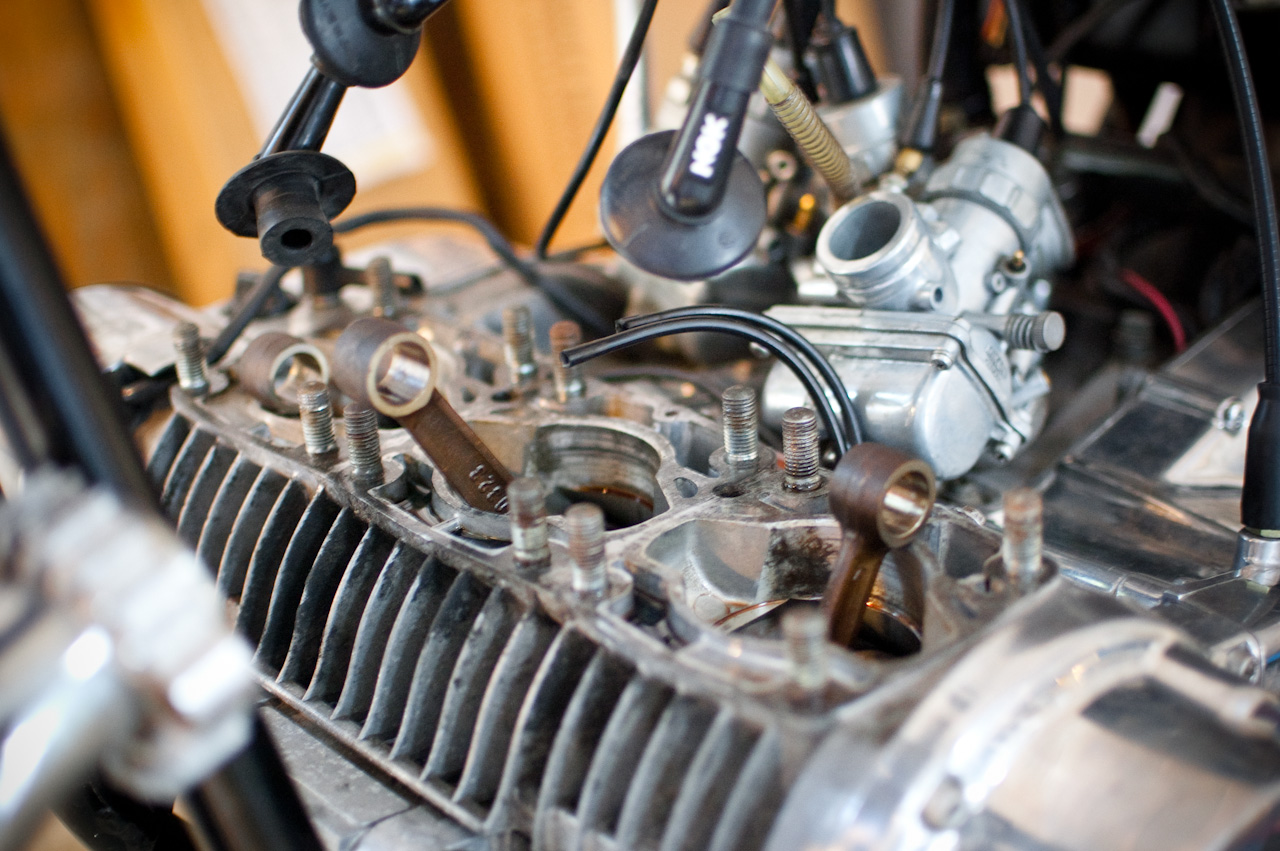
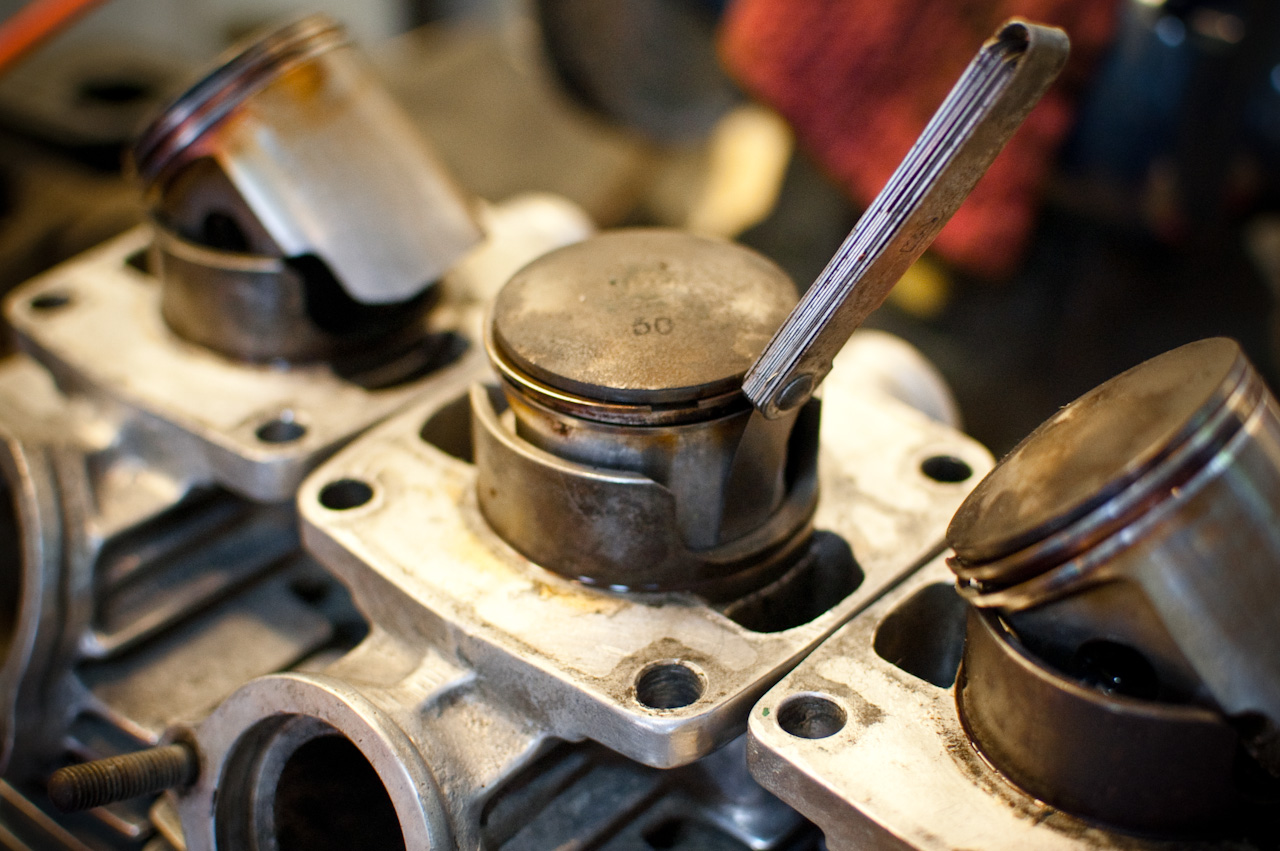
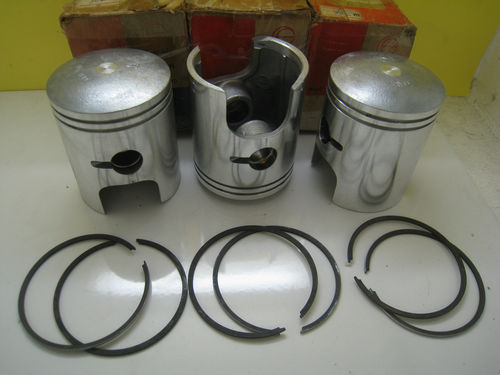
Performance and smokiness had somewhat degraded lately and there were new interesting sounds coming from the engine. I found the culprit. My head gaskets had all failed and I had leaks from the combustion chamber. The carbon buildup on the head was also pretty heavy, no doubt due to that sweet castor oil I use.The pistons were still reasonably free of crusty carbon, more oily goop rather than hard buildup.
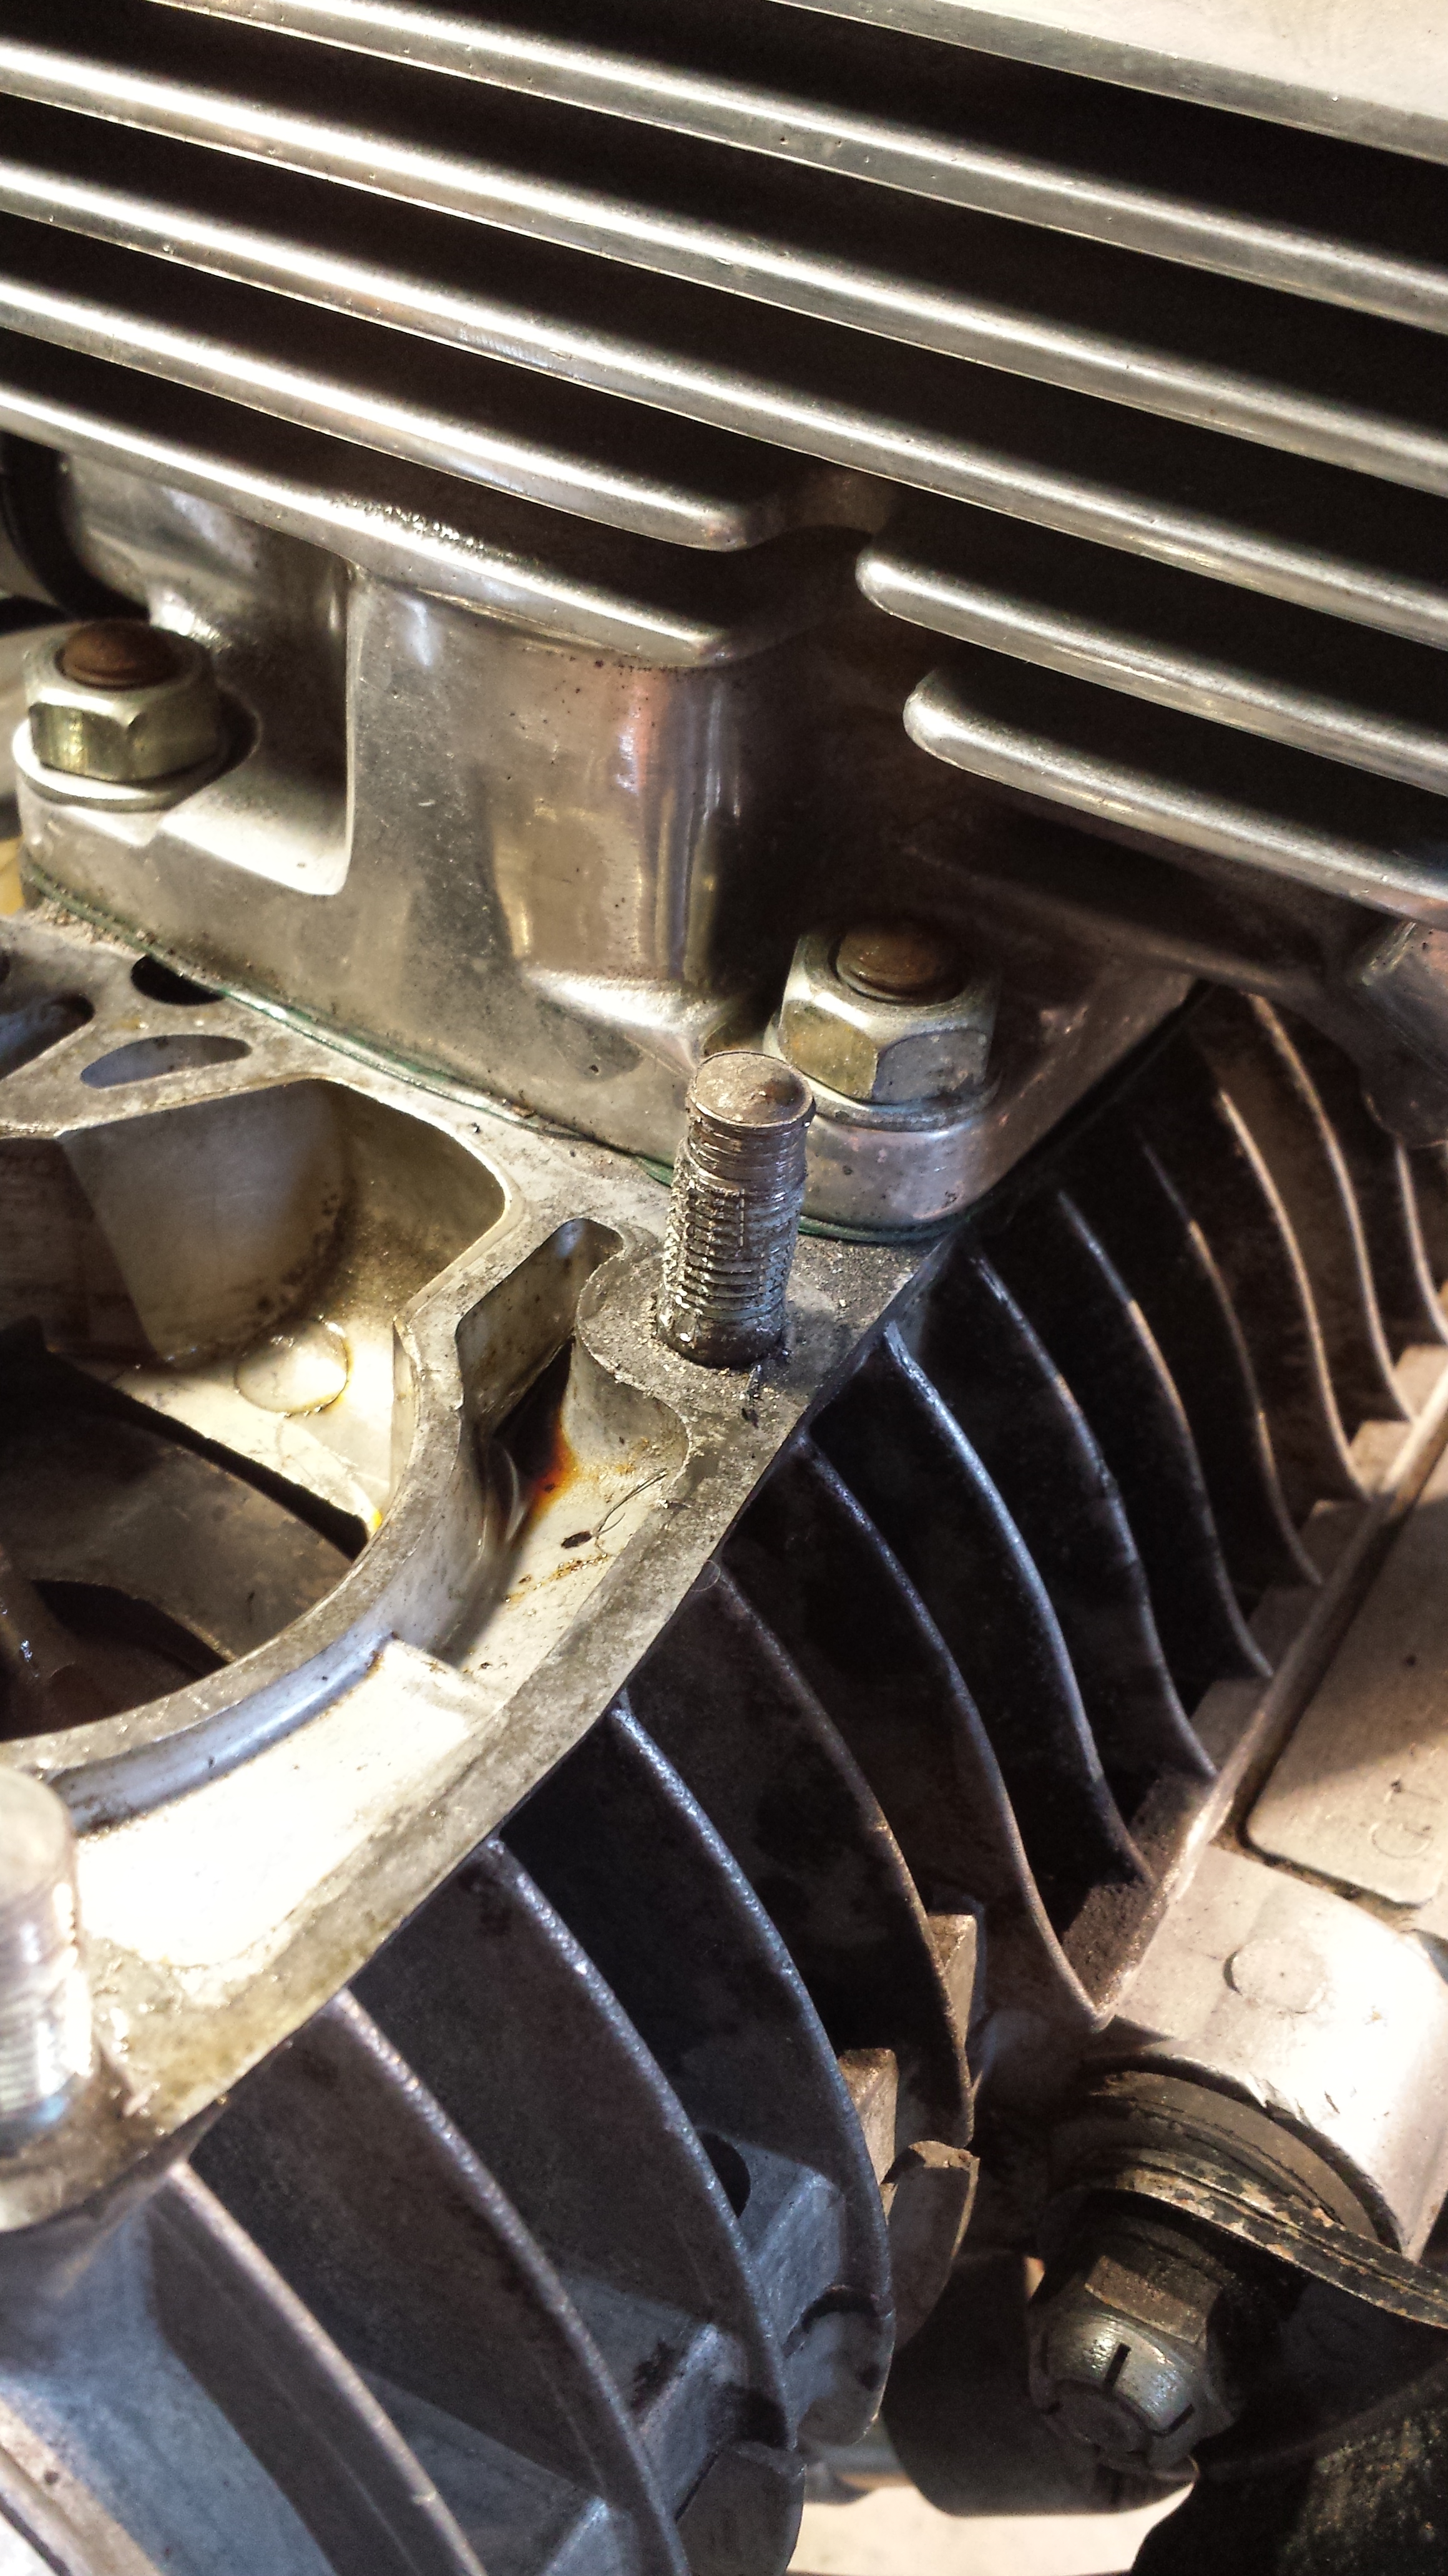
The head came back nice and clean after some good brushing. I also replace a cylinder stud that was stripped.
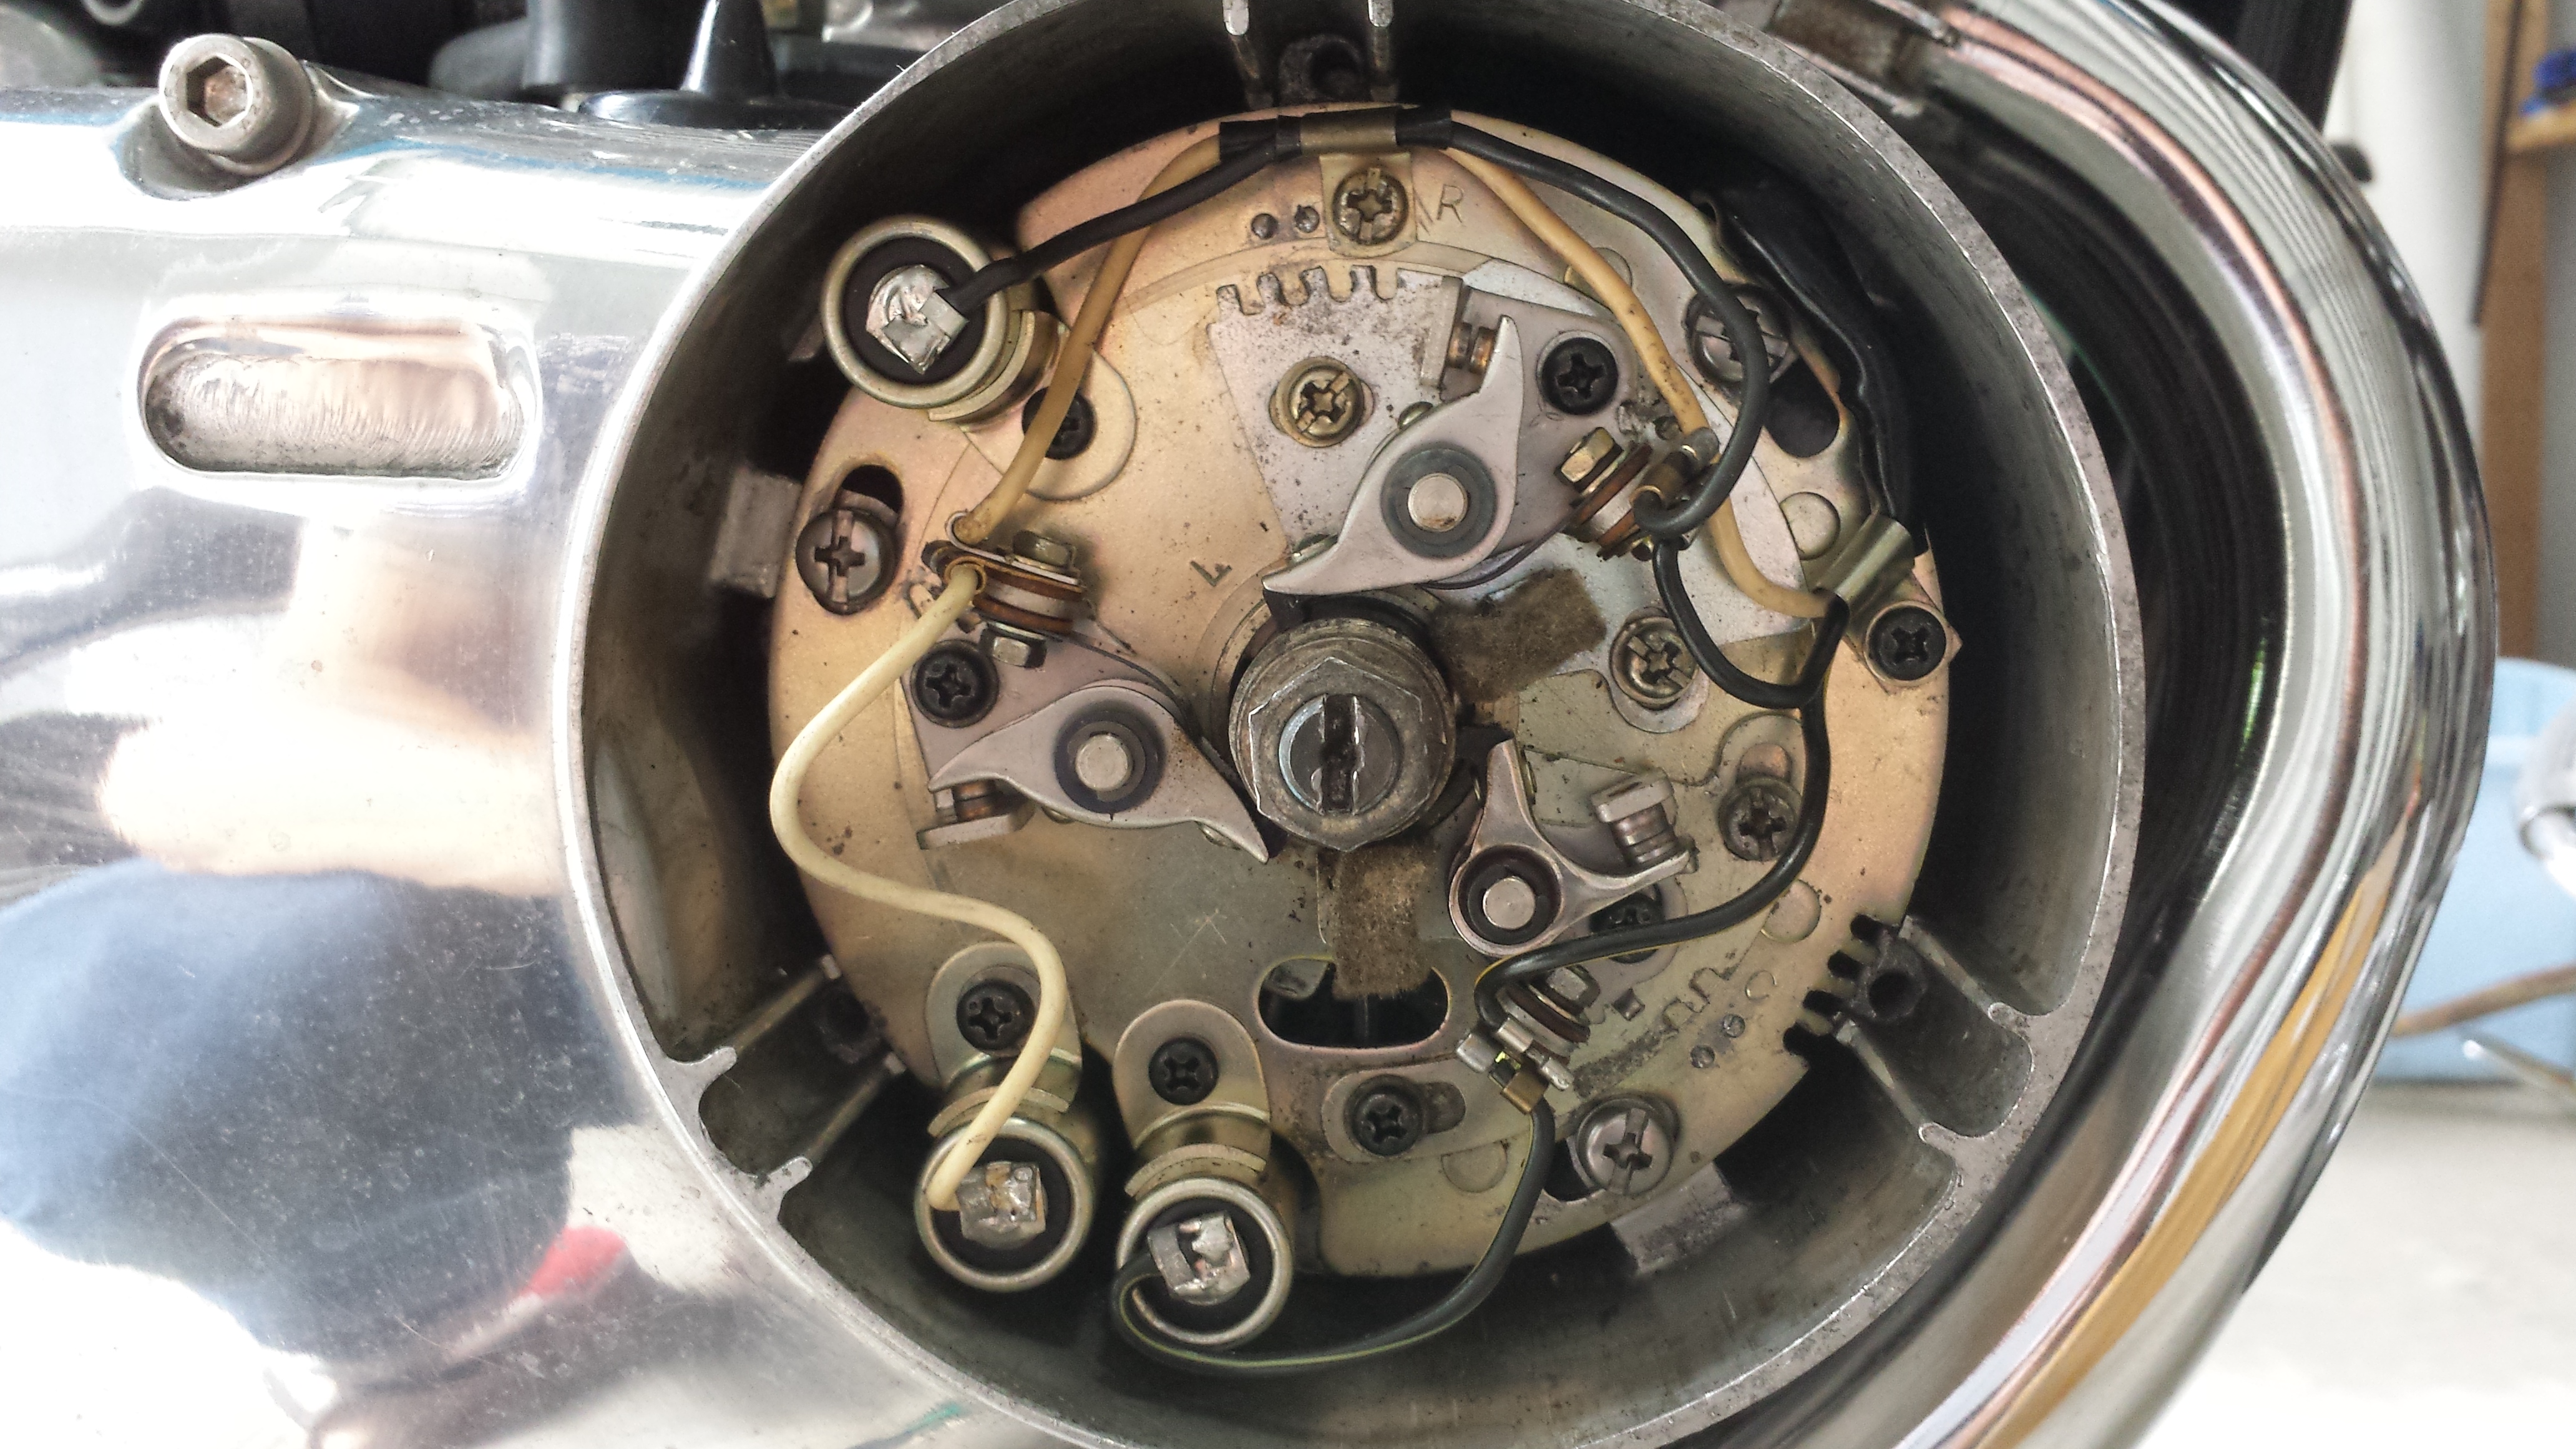
Since I was at it I also put fresh points and condensers.

She runs super strong again and the smoke is gone. Interesting how the head gasket can affect the smoke.

suzie at workfresh points

Head gaskets leakage De carbonized head Head before de carbonizing carbon buildup stripped stud New stud

Nice Rack

Since I now go for rides with my son Leonard, I was looking around for a passenger grab bar for him.
I found johnakay on the sundial forum. He is a gentleman from the UK who makes excellent looking reproduction of suzuki racks. I settled on the full rack rather than just a grab bar and  ordered it from John.
It came in the mail yesterday and it is a beauty. Probably nicer than what you could get from Suzuki back in the days.
I just installed it and if I say so myself, it looks fantastic.

I had to remove the signal mounting bracket thingy and the original parking handle.  Ill have to find a way to not loose these for the future owners of the bike.

Aug2013-7

Before

Before

after

after

Take off

Take off

Back on the road.

I finally received my pistons from malaysia. The boxes looked like they were made around the time of the pyramids but the pistons themselves were in perfect shape. The rings had some light surface rust but that came of with 400 grit sandpaper. I did have a bit of trouble installing the rings until I figured that they were the keystone type that must be mounted face up. The face being the side with text on it.

I got the jugs re bored and honed by gordbushperformance, a real professional job with the correct piston clearance of 0.045mm. I also installed new pins, clips and small end bearings.
I also replaced the points and condensers while I was at it. They were starting to look pitted.
Right away, I could tell this was a whole different engine. It sounds great , kinda like a liquid cooled engine. The mechanical noise is a lot more muted and everything sounds good and tight.

After starting my break in, I noticed two oddities. It would not idle correctly and the left pipe smoked quite a lot at low speed or at what passed for idle.
The idle would kind of fade away or at time surge and generally be inconsistent. I figured a plugged pilot jet was the issue.
The smoking right pipe was more of a mystery. It can’t be gearbox oil seeping through a bad seal because the left side faces the alternator, not the gearbox.
Well oddly enough, both problems were related. The pilot jets were all more or less plugged but the left one in particular was super cruddy. I must have shaken sediment around when taking the engine apart.
After cleaning everything, not only the idle became nice, strong and stable, the weird left pipe smoke went away. I am not sure I understand how a very lean condition at low throttle leads to more smoke but hey, this is good to know for those with unusual smoke on one specific pipe, check your carb!
The engine is very strong now, must be those extra ccs:) I ended up installing a larger sprocket in front because the gearing felt too short with all this extra power.

I have to say with a well tuned, fresh engine, this bike is one on the most pleasurable ride I have had in my 30 years of riding.

NOS right way pistons

NOS right way pistons

Before

Before

After

After

Aug2013-3

Aug2013-5

Aug2013-6

Good news

So I finished the top end tear down this morning.
Good news is that all I need is a new set of pistons and a rebore. Basically the  current pistons are way too loose.

When I got the bike 2 years ago it had oversize 0.05 pistons in but they had seizure marks and were generally shot. I put in fresh .05 pistons from Cruzinimage after honing the cylinders.
It seems that the cylinders were pretty worn out and the honing compounded the problem by enlarging them even more.
I just measured the piston clearance in the center cylinder (the worst one) and I can fit a 0.15mm feeler gauge. That’s a lot of gap! The factory recommended gap is 0.045mm.

On the bright side I measure the lateral play on the con rods and they are all under 3mm which is within specs and there is no vertical play so I don’t need to rebuild the crank.

It is getting difficult to source pistons. Suzuki is out of the oversize 1.00. I did finally find on ebay malaysia a set of NOS oversize aftermarket pistons made by Right Way, a reputable OEM manufacturer. They are on their way along with suzuki pins, clips and small end roller bearing.
The only downside and they are 1.50 oversize which is close to the maximum bore possible, I believe 1.75 is max. I guess I have only one rebore left after that.ImageImageImageImage

Top Down

I quickly took the head off tonight as I am curious to see what that new noise is. I think I found out.
The cylinders are worn out with a strange marbled pattern and the pistons, especially the centre one, have a lot of play. Just touching the piston’s head, I can wiggle it around and make it click in  the cylinder. It seems like my reproduction pistons fitted to rehoned, but not rebored, cylinders was not quite right. I wish I had checked the clearance then…

Hopefully when I dig in deeper this weekend I wont find any disaster and all I need is a rebore and new pistons, OEM this time.TopDown TopDown-2 TopDown-7 TopDown-4 TopDown-3 TopDown-5

Funny noise

Since I sold my harley a few weeks ago, I have been riding Suzie a lot more. Between my work commute and the odd weekend ride, I put 500 miles on her last week alone.  I even went for my first long ride, 4 h with my son.

RideWithLenny
I recently noticed a strange clicking , rattling noise from the engine. It’s hard to describe but it sounds mechanical, clock like, and is linked to engine speed, not the bike speed. It’s more noticeable on low loads and it has become increasingly more present.
My first suspicion was the nylon timing gear that drives the point cam. This gear is notorious for shattering after extended use and I thought it might be going bad. Well I was both right and wrong.
The gear was indeed cracked and would have blown in my face pretty soon. However, after replacing it along with bearing seal and other doodads, the noise is still here and getting a lot more obvious. It has gained more of a deep rumble quality with a ticking layer on top. It used to sound like an oversized clockwork now it’s getting to sound like a washer and dryer.GearAndTire-2 GearAndTire-3 GearAndTire-4 GearAndTire-5 GearAndTire-6

I now suspect that more serious things (read expensive) are happening in there. I will open the cylinders this weekend to check in the small end bearings and piston clearance is ok.  if that’s fine then it must be the crank bearings which means a complete tear down and splitting the case.
Our work is never over…

Tire swap

I had the wrong tire fitted to the front wheel and I finally got around to change it. The current tire was too wide and the tread design just didn’t look right for a 70’s bike. I manage to source a duro tire in the correct, and now rare, size of 3.00-19 with a perfectly vintage design.

I also changed the fork oil as it was getting quite bouncy. The  bike feels quite a lot nimbler in corners.GearAndTire-9 GearAndTire-7 GearAndTire-8

Spring cleanup

It seems Suzie sprung a leak over the winter. The neutral sensor switch thingy has a O-ring that got old and started leaking.
No problem; this was the perfect opportunity to to some overdue maintenance, namely replacing chain and sprocket along with the clutch started slipping.
The  chain is a continuous type and I had to learn how to use a chain riveting tool.
I have to say, changing a clutch on a bike is so simple, it makes you wonder why it is such a PITA on a car.

Went for a spin and she is smooth and fast. New chains are the best!ClutchAndChain ClutchAndChain-2 ClutchAndChain-3 ClutchAndChain-4

No Trailer Queen

I entered the Shitbird Chopper Challenge this summer with suzie and Guess what, I have the best time so far!

“The shitbird chopper challenge is an 800 + km test. From Toronto, around Lake Nipissing and back on a “bar hopper” in one day. Fastest shit bird gets a prize.”

I did my 853km in 9h23min. That’s 91 kph average including pee, gas and sandwich stops. Suszie ran between 130 and 150 kph the whole way like a charm. I sure kept the engine clean that day!
This ride was the swan song for my chain and sprocket. I got a new set and my next project is to swap it up.

Suzie Blue is in Cycle Canada!

Check out the article about Suzie Blue in Cycle Canada by Steve Thornton. Pretty awesome!

Touring

Through accidental circumstances the GT380 has now become a touring bike.

See, I also have a Harley and that’s my typical ride around town and for weekend trips. Well as it turns out, my Dyna was destroyed by a truck who backedup on top of it. The bike was a writeoff, bent frame and all, and although I ordered a new one, it will only be here in October. So for the time being my little hoby bike is now my main ride. Not letting this stop me in any way, this weekend the girlfriend and I went for a nice 3 days, 700 miles ride through norther ontario. Toronto to manitoulin island to sudbury back to toronto.

The GT performed flawlessly. In fact it seems to work even better now! I have put over 2000 miles on this baby since the rebuild and the engine feels very solid for such al old bike. The handling and the lack of storage or windshield make for a challenging ride in cold rain but aside from that it’s a surprisingly capable touring machine.

Harley under the truck

Suzie and I in Gore Bay

A little bit of paint

I kept looking at that triple tee and those scuffed up control and it was time to do something about it. Here comes the Rustoleum. I baked the paint for a few hours for additional durability. At the same time I rebuilt the master cylinder that was filled with grimy sludge. I also painted a few odd pieces that were worn out like the seat pan, battery basket and toolbox.

Before:

D

During:

After:


Smoking cessation

Well after over a 1000 km of riding, the smoke didnt get any better. In fact it seemed to smoke even more. The oild consumption was also totaly nuts, 1 litre of oild per 3 fill ups. I had to tackle the problem for good after I got pulled over by the cops and fined $110 for “unreasonable smoke”.

I decided to take swap the oil pump with a used ’76 unit from ebay. That was it!!  Almost immediately the smoke went back to what you’s expect, a faint haze under full load and virtually nothing at idle.

I took both pumps appaft to see what could make such a difference and there it was. The old pump had been disassembled in the past it seems and was reassembled with the cam turned 180 deg the wrong way. The notch facing down when it should have been up. The result is the pump was at maximum output all the time.

Old pump with cam facing the wrong way

The notch should be facing the other way!

Now I can’t blame whoever did this because these GT oil pumps are quite cryptic. In fact taking it apart gave me no clues as to how it works. I had to read this diagram to finally understand it. Quite a clever design but totaly not what I had expected.

But boy does she smokes

I finished breaking in my new top end and so for she purr like a tiger. My only issue so far is a rather erratic idle and a pretty serious smoking problem. I used a full quart of oil in three  gas fill ups. That seems like a lot. I also have oil dripping from the pipes and she just smokes like a bad diesel.

I adjusted the pump by the book, tried smoke free synthetic oil and although it helped a bit, i still find the smoke level to be too much. I read on various forums that as the pump ages the output increases. I now have to do a flow test as per some suzuki documented procedure. I will replace the pump with a 76 model I found on ebay if the rate is out of whack.

The engine runs fantastic aside from that and I can reach 90 mph easily before the handling starts to scare me.

She Lives!

I just got back from a short trip to brazil saturday and I was itching to get back to the two girls in my life, Takami and Suzie.

Takami gave me a hand and we started wrenching away. After synchronizing the carbs and the oil pump (easy enough), we installed the instrument cluster. Connecting all the  electrical connectors was simpler than I expected. I usually dread any electrical work but with the help of Takami and the wiring diagram this went smooth and we didn’t even blow a fuse.

Last came the gas tank and fuel line. After a few mishaps like installing the petcock backwards, i siphoned some gas from the harley and she was ready to go.

She started after 3 kicks! I was pretty impressed considering I have not yet done a proper ignition timing.

The smell, the sound… A thing of beauty!

I have to baby those new pistons for a while but I can tell the engine feels strong and runs smooth.

Now I have to get her plated and insured and take her out for a ride 😀

Yikes!

That was easy!

Petcock installed backwards...

You can almost smell it


Big weekend

Me and my man Lenny did some serious work this weekend. Next, the carbs.

Pistons and brass

Yeah, it’s warm again. Above freezing at least.

Today the pistons and cylinders went in. I had to remove the remaining 2 pistons left that I never took off. The pins were really stuck (maybe from the cool temperature) and I ended up using a torch to heat up the pistons. The pins slid right out after that.

Before installing the cylinders, I replaced the oil line for the Suzuki Recycle Injection System. The hoses attach to a brass valve in the crankcase. Taking the vales off for inspection revealed that one of them was broken and probably explains why the crankcase is so oily. I have to source one of these guys online. Not even sure what it is called…

Putting the pistons and cylinders on was surprisingly smooth. Although I did mount the centre cyl backwards at first 🙂

Smells like spring

I may be a optimist but the temperature has soared from around -20 to a balmy -2 and that gives me the bike itch. I had not done much to suzy lately so I got buzy again.

First off I finally cleaned up and rebuild the carbs. There was a spectacular amount of waxy crud left from the metal shop. It took quite a bit of carb cleaner, WD 40, compressed air and Qtips to get everything nice an clean. But here we are I have complete carbs with new adjusted floats, new gaskets and hopefuly clean innards.

Carb bowl crud

Airscrew crud

Venturi dirt

Stuff that came off the carbs

Finally done

Next came the cylinders and head. There was quite a bit of polishing stuff left in the transfers ports. I also had some caked on gasket bits to cleanup. I am a firm believer of using the kitchen sink for mechanical cleanup and got everything out with carb cleaner and a toothbrush. Once cleaned and rinsed, I dosed everything in wd 40 to displace the water and put in the oven at 105 to make sure all the water is gone. I am left with clean parts lightly coated in oil so that they don’t rust. I feel like the Martha Stewart of engines.

Yuck

More yuck

Messy job

Bake 10 min at 105C

Tada!

As soon as I get an above freezing day I start to bolt things back on.

Winter sucks

I have not been able to do much to the bike lately due to the fact that is is frikin freezing in my unheated garage. I did however get a shelf and organised my growing pile of engine parts. I am now patiently waiting for some warmer days. I will finish cleaning and reassembling the carbs tomorrow now that I got some cleaner and compressed air.

Carb rebuild part one

Today I went to the motorcycle supershow in toronto, saw lots of bike stuff and that got me all edgy to get my hands dirty. I decided that finaly, I would rebuild the carbs. I have a whole bunch of small tidbits to assemble but it should be a breeze.

One touchy parts is the floats. The old floats were dented, cracked and generally old wich may explain why the bike ran kinda rough. I got new floats and proceeded to adjust the height as per the manual.

Now interestingly, I noticed that the old floats were not adjusted correctly. In fact they were not adjusted at all. The adjustment tab was flat. This is the way the tab is on a new float, pre-adjustment. I double checked and indeed once correctly adjusted, the tab should look bent. I suppose at some point in the past someone replaced the floats, never bother to adjust them and the bike never ran well.

It take a while to get it right but eventualy I got the height set within tolerance.

After that I started putting all the screw thingies like the air screw and the idle screw. Problem! All the small cavities , threads and channels are gummed up with polishing wax and super fine metal dust. I tried to clean them with Q-tips and blowing air but that stuff is very waxy. I need to stop here and get a chemical carb dip to get everything out. Oh well at leat it looks nice for now.

Ready to go

Easy to loose stuff

Old float dingged and cracked

Old float tab, flat, never adjusted

New float with adjusted tab

By the book

The book

Nice must need to be taken apart and cleaned


The rebuild has begun

Not much happened during the past few weeks but now things are back on track.

I have received the last few parts from the polishing shop – the carb bodies and I got new floats and gaskets waiting to be installed. Tonight i rebuild the carbs!

In the mean time I started on the right side engine cover. I swapped the points. It’s a weird set up where the 3 points are not all the same. I also installed a new oil seal in engine cover for the kickstart. The seal was different from the stock unit as the outer part is made of metal, it looks more like a ball bearing. Twas a bitch to put it in, I had to heat the cover in the oven at 90C for a bit while I placed the seal in the freezer. The heat expansion allowed the seal to fit but it took some hammering.

I also re wrapped the wires that go to the points in heat shrink tubing as the original plastic tube was all brittle and cracked.

Candy

All the sheetmetal has been dropped at Connery custom paint to get a whole new paint job. I am going for an improvement of the stock look. Basically same colour and pattern as the original but better paint (candy) and the yellow/white swoosh will be painted instead of the vinyl graphic of the original. The job includes sandblasting, prime, silver base and clear blue candy coat-yummy!I am restoring to be as close to stock as possible but I don’t mind improving on the factory specs when required.

The paint just looks awesome. It’s quite difficult to do it justice in a photo but the depth of the paint and the richness of the blue is just spectacular!

Sandblast

Primed

Silver

Candy

Swoosh

Tada!

News from the shine men

Ok so this morning I went to the polishing depot to shoot some video and take a bunch of pictures as they work on the last of my parts. I went there for 7:00 Am saturday morning wich is pretty early even by my standards. These guys are hard core and start typicaly between 4 and 5. The shoot went great and I have about 20 minutes of good footage that I now need to edit. I also took a series of stills. See below for the work in progress. The carburetors are going to look spectacular. Seeing the before and after, it’s hard to believe I was looking at the same pieces.

Click on images for hirez.

Red carpet

Takami who is now a full time member of my restoration team is also a very fine artist. In fact you can check her work here:http://artbytakami.com/

Now this is very convenient as my tank embelms needed to be repainted. The red varnish in the letter was peeling off.  Takami repainted all the letter with a red nail polish (red carpet is the colour) and it looks awesome! I could never have done such a clean job and the nail polish has just the right amount of transparency to look like the factory red. Now this makes the plack painted part look all sad and old so that will be painted next as soon as I get some goth black polish.

Lots of new goodies

I’ve now received the final bits I needed. The engine cover emblems, the exhaust gaskets, the gas tank strap and all the hoses and clips for the SRIS (oil recirculation system).

I also received two beautiful brand new JIS screwdrivers bought in Japan last week by a friend. And last but not least a whole bunch of brand new bolts and washers to add the finishing touch to the engine.

I now have a substantial pile of parts that I need to turn back into a working engine. It’s getting pretty cold out so this may take a while.

Polishing update

Update from the polishing depot.  I went there today to see the progress. The guys were working on my parts and it pretty cool to see it done live.
As I was taking some pics we got talking and we made a deal. I will shoot a video of them polishing my carbs and showing all my shinny parts and in exchange they’ll polish my carb for free. This will be good publicity for them on their web site and I will add the video to this blog as well. Now that’s what I call a win win situation!

Aluminium and paint

I called the polishing shop today to see if my parts were ready as promised.It was not ready yet. I’ll drop by tomorrow to give them the pistons and see how it’s going.
That got me into a polishing mood and I decided to take off the oil pump cover that I forgot to bring to the polishing shop and give it a try by hand. I have a can of mothers aluminium polish lying around. It worked quite well though it’s no mirror and it took a lot of elbow grease. Now I know why this work isn’t cheap.

before

After

Takami, my awesome fiance also got involved and waxed the  tank and side panels to see if we can work with the original paint. We also took off the emblems as the red varnish is peeling off and we are going to try to repaint it with nail polish. The side panels came out really nice. The tank is a bit too rough for my taste. The paint has many little cracks from sun damage and a variety of small chips as well as some surface pitting. I need to get some paint quotes. As for the emblem we’ll try repainting; new ones are very pricey.

wax on

Wax off

Carb Soup

I decided to give the carbs a thorough cleaning.
They clearly have been cleaned recently but not squeaky clean.  I decided to go with the old boiling technique. Basically I took everything apart, put aside the rubber bits (orings and such) and boil everything else for about half hour in a mild acid solution. I din’t have any vinegar or lemon juice so I added about half a cup of this bathroom cleaning spray that has acid in it to dissolve lime. Base on the colour of the water after about 15 minutes, this works quite well. The carbs came out very clean but super dull looking. I pick up some polishing bits for my dremel and will give it a try this weekend. I also ordered some new floats from Suzuki canada as one of them is in fact cracked  and leaks.

Before the boil, not super clean

Lots of bits

ready to go; clean liquid

Half hour later, nasty stuff

All clean, just waiting for new floats

Bonanza

Once again, ebay delivers. I have received a whack load of parts in the past few days. I am still missing a few items but the pile is getting high. Most impressive was the new piston set. They came from Japan in under a week!
Most other parts are either from the UK (points, oil seal) or the US.
Some parts have been tricky to get. I sourced the SRIS oil breather hoses in california along with one of the alternator brush (the positive) but I am still looking for the other (negative) alternator brush.

Pistons and points

Gaskets

NOS air filter boot

Oil seals and bolt set

Gauges cleanup

Ok so after dismantling things for a while, it’s time to reverse the trend and start rebuilding.

I went to buy one those 3M headlight polishing kit. It works quite well but its somewhat messy. My advice if you ask the girlfriend to help you is make sure she wears an apron! The results are surprisingly good for a do it yourself kit. It doens’t remove the microscopic cracks in plexy of course but it definitely restore gloss and transparency. I also used some armorall on the black plastic shell to make the whole unit look a lot newer.

before

After

Tools

I love ebay, everytime. It’s like beer.
Today I received a set of original tools for Suzie. Now they don’t look like much but they are original and they include two of the rarest tool this side of the globe, the JIS screwdrivers. For many years I cursed the Japanese and their POS screws while I destroyed them with Phillips drivers. It is only recently thanks to Google that I have learned about JIS screws. Fair enough. I just wish this had been mentioned in the owner manual to avoid massive aggravation on my part. Well, now with these tools I can take my carb bowl screws off without ruining them, hurray!

Original tool kit

The legendary JIS screwdrivers

Off to the shine man

I dropped off 11 pieces of metal at the polishing depot today. http://www.polishingdepot.com

In 2 weeks I should have a very shiny bunch of engine parts. This includes the top end. They will hone the cylinders at the same time. The guy did a bit of work on some cooling fins for me while I waited, it was spectacular, night and day. I was hoping to get the carbs polished but that is just too costly.

Top end comes off

So today I decided to take the top end off. I want to get the head and cylinder cleaned up as there is a lot of surface corrosion on the alloy.

Last known picture of the top end intact

First I took off the carbs. The rubber boots are harder than Chinese algebra and will be replaced. I cheked inside the carbs. Looks OK. They have been cleaned and rebuilt recently. However the metal floats have been crushed a bit. I may look for better ones.

Carb bowl. Looks like it was cleaned recently

Dinged up float

Then the head came off followed by the cylinders. This took some time with 24 nuts that are not always easy to reach and some tiny and very tight hoses for oil recirculation. The head is in perfect shape but I wish I could say the same about the pistons and barrels.

The cyclinder barrels are scored and a bit rusty, surface only damage so rebore should not be required, rehoning should do. The cyclinders are already at 0.5 oversize  so they have been bored up in the past.  The pistons look mighty bad. The center one in particular has some nasty seizure mark. This is beyond cleaning but I found some new pistons on ebay from japan.

Taking the pin off the piston was a bitch. I had to rig an extractor using a bearing puller to get it out.

Serious seizure scoring on the center piston

Patch

Vintage 70's patch

Air filter boot trouble

So my air filter intake boot, the rubber thing that plugs into the 3 pipes, was damaged. One of the carb side inlet has been squished and worn out so it wont attach correctly. I got a used air filter ,on ebay from a 74 bike. It was quite dirty but in good shape. I spent a good while cleaning that boot up, waxing it and eventually found out it doesn’t fit. Dam it the 73 and 74 parts are a little bit diferent size on the large inlet that connect to the filter. Now I know. I have to sell that 74 part on ebay again and source a 73.  On the other hand I cleaned the filter good and gave it a good oiling.

Messed up boot

74 filter

Cleaned up boot

73 and 74

Gauges

The gauges work fine and are overall in OK shape but the lenses are very yellowed. Also while disconnecting a spaghetti of wires in the headlight I noticed that the shell is quite rusty. I will have to repaint that.  As for the lenses I heard on various blogs about a 3M headlight lens restoration kit that is supposed to work wonder. We`ll see.

Pipes

Did a good scrubbing on the mufflers. The chrome is still in good shape and I don`t think I`ll need to re chrome.

Alternator

The alternator seems to work ok but the brushes are toast. This may take a while to source new ones. There are two types of alternators found on the GTs, Nippon Denso and Kokusan. I have the Kokusan.

Points

So the points are badly pitted and the little bakelite rubbing blocks are all worn out. I have the Kokusan points rather than the more common Nippon Denso and these parts are getting rare. I found a set of replica on ebay from the UK. A bigger concern is the breaker cam. Obviously the cam has been running dry for a while as it is all rusty and. I’ll try to smooth it out with fine emery cloth if not I’ll need to find an NOS replacement.

My GT 380

So I got myself a nice little GT to rebuild as a winter project.
I grew up on Japanese 2 strokes from the 70’s. The triples were the hot stuff then and I always wanted one.

My buddy Matt has been kind enough to let me do some wrenching on his 74′ Cb SOHC over the summer and that gave me the taste of old engines again. It took a bit of time to narrow down my search. It had to be from the early 70′ before everything became ugly; it had to be multi cylinder and it should have some personality. A triple 2T fits just right. These engines have the kind of attitude that modern bikes lament and they just sound, look (and smell) like nothing you see on the road these days. Plus they are mechanically simple and fairly solid.

Suzie is a 73, completely stock with 25000 miles.
This blog is to keep an account of the progress as I work along to bring her back to glory.

Carb synchronisation

During teardown, I checked if the carbs were synced and they are way off. The right carb opens before the other two by a nice margin. Must remember to adjust this once I learn how to do it.

Ready to shine.

Well after a day of tear down I now have a bunch of tarnished metal that is ready to get polished.

Day 1

So my plan is to get the bike in near new condition. This will take some time and is likely to end up like one of these government projects, over budget and delayed several times.

Luckily the bike is almost complete and runs. She doesn’t run well but she started and could almost hold a decent idle.

I decided to start by tearing down everything that needed to be polished re chromed or painted. As I take things off I get a better look at the inside to see what should be fixed in there.

First I got the tank off to get a better view of the engine and electricals.

Now the Ram air scoop comes off. This was very oxidized. The head is also looking mighty chalky. The plugs looked OK but the center plug was loose.

Next thing is the clutch cover. There is a nice oil leak coming from the kick start oil seal so this had to come off. This reminded me of how much of a PITA these japanese screws are. These dam JIS screws get chewed up by a Phillips driver in no time. I had to take a brake, go to Atlas tools on queen and get an impact screwdriver to save the day. Eventyaly all 9 screws came off. The clutch and all internal looked good. The bold on the right end of the crankshaft looked like it had been serviced ad some point.

I was on a roll so after removing the mufflers, I got onto removing the alternator anf the chain cover. Not problems here.